Looking for a wireless backup camera system that makes backing up and maneuvering your RV, trailer, or tractor feel safer and easier?

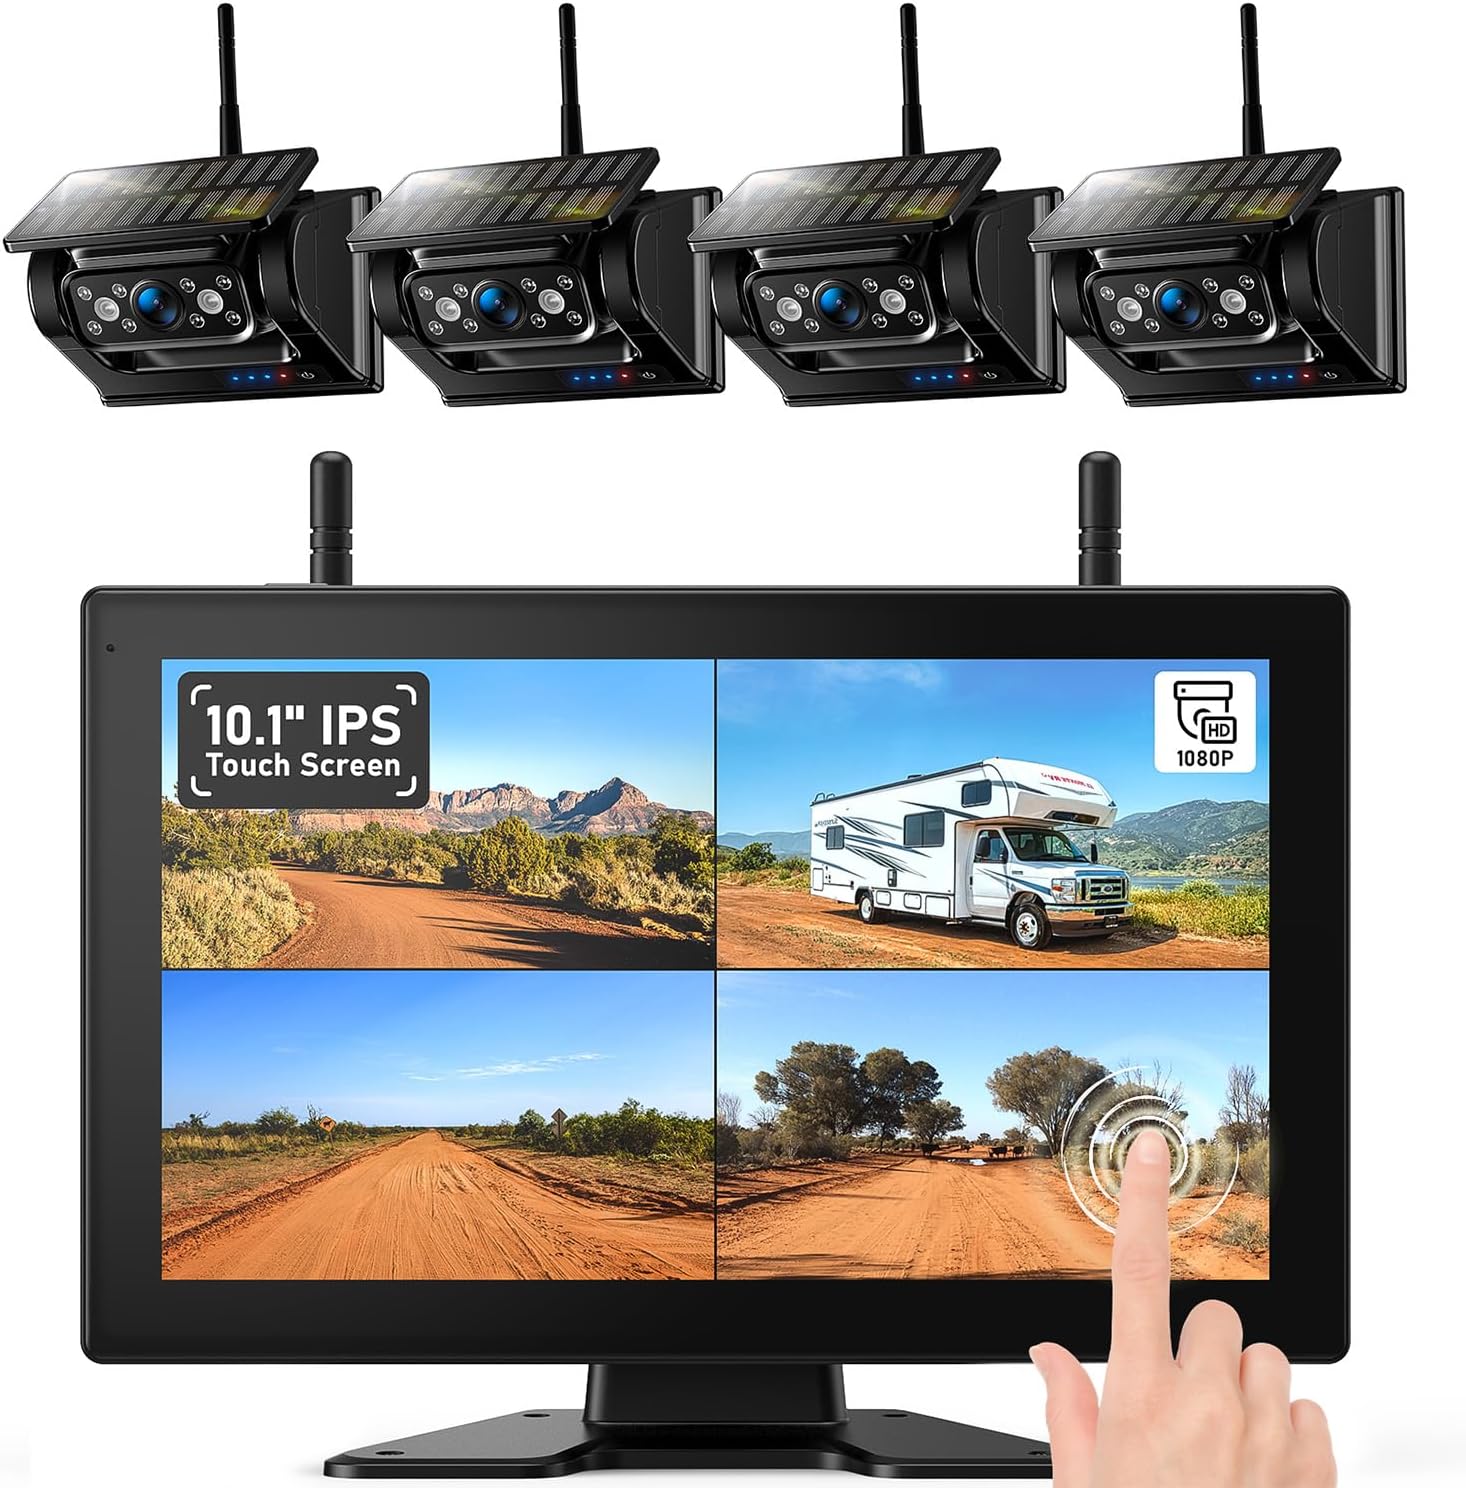
Quick Overview of the 4 Magnetic Solar Wireless Backup Camera HD1080P DVR 10.1″ Touchscreen Monitor, Quad RV Rearview Backup Cameras Wireless System (BL104)
You’ll get a complete 100% wireless camera package designed for large vehicles, including a 10.1″ touchscreen monitor and four magnetic cameras. The system pairs solar charging with a 9600mAh internal battery and DVR loop recording so you can monitor, record, and review footage with minimal fuss.
Key Features
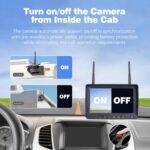
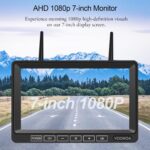
This system focuses on simplicity: magnetic mounting, touchscreen controls, and automatic camera startup/shutdown with low power consumption. You’ll also benefit from dual antennas for signal stability and a monitor capable of dual or quad view at full HD 1080p resolution.
| Feature | What it means for you |
|---|---|
| 4 Magnetic Cameras | Attach cameras quickly to any clean metal surface; great for trailers and RVs with metal panels. |
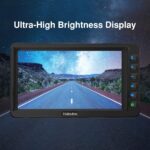
| 10.1″ HD1080P Touchscreen Monitor | Large, touch-controlled display for easy viewing and switching between cameras. |
| Built-in 9600mAh Solar Battery | Solar-assisted charging reduces the need for manual recharges; USB-C backup charging included. |
| DVR with 32GB Card | Loop recording automatically overwrites older files so you don’t run out of space. |
| Dual Antennas & Signal Booster | Improved wireless stability, up to ~300 ft open distance; reliable at highway speeds on the road. |
| Low Power Consumption | Cameras power on/off with the monitor to avoid unnecessary battery drain. |
| Magnetic Base | Fast, tool-free mounting on metal surfaces; requires a magnetic plate when surface isn’t metal. |
| Not for Vertical Side-Mounting | Cameras are not designed for vertical orientation as a side view — plan mounting accordingly. |
What’s in the Box?
You’ll receive the 10.1″ touchscreen monitor, four magnetic wireless cameras, a 32GB memory card already installed, USB-C charging cable(s), antenna(s), and mounting accessories including magnetic plates for attaching cameras. There’s also documentation and a basic user guide to help you pair and operate the system.


Design and Build
The cameras use a strong magnetic base to hold to metal surfaces, which makes installation fast and non-invasive. The monitor is a larger, dashboard-friendly touchscreen designed for straightforward operation and good visibility while driving or reversing.
Cameras
Each camera is compact, weather-resistant, and designed for outdoor mounting. The magnetic base is durable and holds well on metal panels, though you’ll need to add a magnetic plate for non-metallic or fiberglass surfaces. Cameras are not supported for vertical side-mount orientation, so keep them horizontal or angled appropriately.
Monitor
You’ll find the 10.1″ touchscreen easy to operate with a responsive interface. The housing is designed for vehicle use, and the larger display is helpful when you need to check multiple views at once. The monitor also houses the DVR functionality and antennas for receiving the camera feeds.
Monitor and Interface
You operate everything by touch — no more memorizing button sequences. The touchscreen display makes switching between single, dual, and quad camera views intuitive, and the menus are straightforward for reviewing recorded clips, formatting the memory card, and adjusting brightness or image rotation.
Touch Controls
Touch-based controls simplify setup and use while you’re on the road. You’ll appreciate being able to tap to change camera views, start or stop playback, and access settings without multiple physical buttons.
DVR Controls
The DVR menu lets you play back recorded footage, manage storage, and set recording parameters. Recording is automatic via loop mode, so your footage stays current without needing frequent management.

Camera Performance
Image quality is solid at 1080p on the monitor, and daytime clarity gives you useful detail for parking, backing, and general situational awareness. Night performance will depend on ambient lighting and camera placement, but the system is designed for improved low-light visibility compared to older standard-definition systems.
Daytime Image Quality
You’ll see crisp, clear images at 1080p with enough detail to identify obstacles, hitch points, or traffic behind you. The wide-angle view helps reduce blind spots when you’re reversing or maneuvering a trailer.
Night and Low-Light Use
The cameras have improved sensitivity for low-light conditions; however, you should not expect perfect night vision like dedicated IR surveillance cameras. Positioning near reflective surfaces or adding auxiliary lighting will help when you need better nighttime clarity.
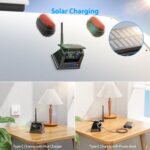
Solar Charging and Battery Life
The built-in 9600mAh rechargeable battery is a standout feature for you when a wired camera is impractical. Solar-assisted charging helps keep batteries topped off during daylight use, and the inclusion of a USB-C cable means you can charge the camera directly when solar input is limited.
Real-World Battery Expectations
Battery life will vary with usage, camera activity, and available sunlight. Because cameras only power on with the monitor, you’ll conserve energy during downtime. In bright, sunny conditions, solar charging can maintain the battery almost indefinitely; in low-sun periods expect to recharge with USB-C more frequently.
Winter and Low-Sun Considerations
When sunlight is scarce, you should plan to charge cameras via the included USB-C cable every few weeks or as needed. Cold weather can reduce battery efficiency, so check battery status more often during winter months.

Wireless Signal and Range
Built-in dual antennas and a signal booster offer a stable feed up to 300 feet in open-air conditions. Real-world vehicle-mounted range is shorter but still excellent: around 50 feet while reversing and approximately 36 feet for continuous operation when mounted on a vehicle — more than sufficient for RVs and trailers.
Reliability at Road Speeds
Even at highway speeds, the system is designed to maintain live video without freezing or lagging under most conditions. You’ll still want antennas positioned for line-of-sight when possible, and be mindful that heavy interference or metal obstructions may reduce effective range.
Interference and Line-of-Sight
Signal quality depends on antenna placement, vehicle construction, and environmental interference. If you experience dropouts, try relocating the monitor antenna or positioning the cameras so the monitor has a clearer line-of-sight.
Installation and Setup
You’ll find installation easy if you have metal surfaces to attach to; the magnetic base means no drilling. For non-metal surfaces, you’ll need adhesive magnetic plates or mounting brackets. Pairing cameras to the monitor is typically simple — power on, follow pairing prompts on the touchscreen, and the system should recognize each camera.
Step-by-Step Installation Tips
- Choose camera locations with a clear view behind or around the vehicle.
- Clean the mounting area thoroughly so the magnet adheres well.
- If your surface isn’t metal, attach the included or purchased magnetic plate securely.
- Place the camera, align the angle, and let the magnet hold it in place.
- Mount the monitor in a spot with good visibility and easy reach for touch control.
- Turn on the monitor and pair each camera as prompted by the on-screen guide.
Powering the Monitor
The monitor needs its own power source, usually wired into your vehicle’s accessory power or a dedicated 12V socket. Make sure the monitor wiring is routed safely and fused per the manual’s recommendations.

DVR, Storage and Recording
The included 32GB memory card stores loop-recorded footage, which the DVR will overwrite once the card reaches capacity. The monitor’s DVR allows you to manually save clips, review recorded events, and manage storage settings from the touchscreen.
Loop Recording and File Management
You won’t need to babysit recordings; loop recording takes care of keeping the latest footage. If you need to preserve an event, use the monitor’s save or lock function to prevent that clip from being overwritten.
Accessing Your Footage
Access files directly on the monitor for quick playback. If you want to archive footage, remove the memory card and transfer files to a computer, or use any supported method the system provides for file export.
Views and Display Modes
You can switch between single-camera, dual-camera, and quad-camera views, and the monitor supports split-screen configurations so you can watch multiple angles simultaneously. This flexibility helps when you’re hitching, backing into tight spaces, or monitoring livestock or equipment.
Optimal View Strategies
Use a quad view while slowly reversing to monitor multiple angles at once. Switch to a single-camera view for a larger, more detailed look when precision is required.
Camera Numbering and Positioning
Label your cameras during setup by their position (rear-left, rear-right, front, backup) so you can quickly switch to the desired angle while driving. Consistent numbering reduces confusion when you’re trying to react to a particular feed.

Use Cases and Compatibility
This system is ideal for RVs, trucks, pickups, campers, horse trailers, 5th wheels, tractors, boats, and cranes — basically any application where you need flexible, wireless camera coverage. You’ll particularly appreciate the no-wiring design for temporary or seasonal setups.
Best Fits
If you regularly hitch trailers, tow boats, or maneuver large vehicles, this system gives you better situational awareness and helps reduce blind spots. It’s especially helpful when you need to add cameras to rented trailers or multiple vehicles without permanent installations.
Situations to Avoid
If you need continuous, long-distance camera streaming in highly obstructed environments, you might experience limitations. Also, because cameras can’t be mounted vertically for side-view usage, you’ll need to consider alternatives for dedicated side-view applications.
Pros and Cons
You’ll want a balanced look at strengths and weaknesses before buying. Below is a friendly breakdown to help you decide whether this system fits your needs.
Pros
- 100% wireless cameras eliminate the need for running long wires.
- Magnetic mounting makes setup quick and non-destructive.
- Solar-assisted battery reduces charging hassle in sunny conditions.
- 10.1″ HD touchscreen is easy to use and view while driving.
- DVR and included 32GB card offer automatic loop recording.
- Dual antennas and signal booster provide reliable transmission even on highways.
Cons
- Magnetic mounting requires a metal surface or added plate for non-metal panels.
- Cameras are not suitable for vertical side-mount orientation.
- Battery performance and charging depend on sunlight, requiring USB charging in low-sun seasons.
- Night vision is good but not equivalent to dedicated IR surveillance systems in total darkness.
- Monitor still needs a power source and professional wiring may be preferable for permanent installations.
Tips and Best Practices
You’ll get the best performance when you follow a few practical tips during installation and use. These small steps make a big difference in reliability and longevity.
Camera Placement
Mount cameras where they won’t be constantly hit by road spray or debris, and angle them slightly downward to reduce glare and capture the area directly behind the vehicle. Avoid extreme angles that could distort perspective.
Solar Panel Positioning
Position the camera’s solar panel to receive maximum sunlight throughout the day. For trailers that spend many hours parked with panels shaded, plug in the USB-C cable periodically to maintain charge.
Monitor Placement
Mount the monitor where it’s visible but not obstructive to driving; make sure the antenna has a clear path and isn’t blocked by metal objects or storage compartments.
Memory Management
Consider upgrading to a higher-capacity memory card if you want longer retention times or if you’ll be recording at higher bitrates. Always format a new card in the device before initial use.
Common Problems and Troubleshooting
If you run into issues, most problems are straightforward to fix with a few checks. You’ll likely resolve common faults without needing to contact support.
Cameras Not Connecting
If a camera doesn’t pair, verify the camera battery has charge and the monitor is powered on. Move the monitor closer temporarily to improve signal coverage during pairing, then re-test placement.
Intermittent Signal or Freezing
Reposition antennas and ensure there’s minimal interference between the camera and monitor. Thick metal obstructions, vehicle compartments, or other transmitting devices can reduce signal quality.
No Power or Won’t Turn On
Check that the monitor’s power source is connected and fused correctly. If the camera won’t power, try charging via USB-C and verify the solar panel is receiving light. Cold weather can temporarily reduce battery output.
DVR or Playback Issues
If playback is choppy or the DVR reports errors, try reformatting the memory card through the monitor’s settings after backing up any important footage. Replace the card if errors persist.
Comparison with Wired and Other Wireless Systems
This system’s wireless, solar-assisted design puts it in a different category than fully wired systems and some low-cost wireless cameras. You’ll gain portability and simplicity at the cost of absolute permanence and possibly slightly lower night-time performance compared with some wired IR systems.
Wired Systems
Wired setups often provide consistent power and uninterrupted feeds, but they require time, labor, and sometimes professional installation. If you want permanent, always-on functionality without recharging, wired may be better, but you’ll lose the convenience of quick transfers between vehicles.
Other Wireless Systems
Compared with other wireless options, the BL104 stands out for its larger monitor, built-in DVR, and solar charging. Some competing wireless systems offer smaller displays or require separate batteries; this package is more all-in-one.
Maintenance and Longevity
You’ll prolong the life of your system with regular cleaning, battery checks, and proper winter care. The magnetic mounting makes camera removal and inspection quick, which encourages routine checks.
Cleaning and Care
Wipe lenses periodically to remove grime and salt buildup, especially after driving through rain or muddy conditions. Inspect the magnet and contact surfaces to prevent corrosion and maintain strong adhesion.
Battery Health
Keep batteries healthy by avoiding long periods of complete discharge. If you store cameras for the off-season, charge them to around 50-70% and check periodically.
Legal and Safety Considerations
While this camera system enhances visibility, you should never rely solely on cameras for safety. Continue to use mirrors and physically check blind spots when required. Also, be aware of any local regulations about camera use and positioning on vehicles if you operate in a region with rules for commercial vehicles.
Safety First
Use the camera as a supplement to mirrors and head checks; it’s an aid, not a replacement. Certain jurisdictions require unobstructed view or set restrictions for devices placed in driver sightlines — ensure your monitor placement follows those rules.
Frequently Asked Questions
You’ll probably have a few questions before buying or during setup. Here are common questions and concise answers to help you quickly.
Q: Do these cameras require drilling to install?
A: No drilling is required if you have a metal surface; magnets hold the cameras firmly. For non-metal surfaces you’ll need adhesive magnetic plates or brackets.
Q: Can I mount the cameras vertically as side-view cameras?
A: No. The cameras are not designed to be used vertically as side views. Keep them mounted horizontally.
Q: How long will the battery last between charges?
A: Battery life depends on sunlight exposure and camera usage. Solar charging helps a lot in bright conditions; in low-sun situations you’ll need to charge with USB-C more often.
Q: Is the 32GB memory card enough?
A: 32GB allows for loop recording and normal use, but if you need longer retention or higher resolution recording for many hours, consider upgrading to a larger card.
Q: Can the monitor be wired permanently to the vehicle power?
A: Yes. The monitor requires vehicle power and can be hardwired to a fused 12V source for permanent installation.
Q: What is the effective wireless range?
A: Up to ~300 ft in open conditions. On a vehicle, expect about 50 ft when reversing and around 36 ft for continuous use.
Q: How is night vision performance?
A: Night performance is adequate for most reversing tasks but depends on ambient light and placement. Supplementary lighting improves results.
Q: Are the cameras waterproof?
A: They are weather-resistant and designed for outdoor use; take care to ensure seals and mounts remain intact after extended exposure.
Q: Can I use the system on multiple vehicles?
A: Yes. The magnetic mounts make it easy to transfer cameras between vehicles as long as you pair and position them each time.
Q: Is there a warranty?
A: Warranty terms vary by seller. Check the product listing or contact the seller for specific warranty details before purchase.
Final Verdict and Buying Advice
If you need a flexible, mostly maintenance-free camera system for RVs, trailers, tractors, or other large vehicles, this BL104 package is a solid choice. You’ll gain easy magnetic mounting, a large HD touchscreen, DVR recording, and solar-assisted operation that reduces everyday charging needs. It’s particularly well-suited for people who don’t want to run wires or who use their cameras on multiple vehicles.
Buy this if you:
- Want portability and quick setup without drilling.
- Need multi-camera monitoring for trailers, RVs, or agricultural equipment.
- Prefer a large touchscreen and built-in DVR for on-the-spot playback.
Consider other options if you:
- Need side-view vertical mounting.
- Require fully permanent installations with consistent wired power.
- Need absolute night vision performance regardless of ambient light.
If you decide to buy, consider picking up a spare adhesive magnetic plate, a higher-capacity memory card, and perhaps a small protective cover for extreme weather. These additions will make your experience smoother and extend the utility of the system.
If you’d like, tell me how you plan to use the system (RV, trailer, tractor, boat, etc.), and I can give personalized placement and setup suggestions to help you get the most out of your BL104 system.

Disclosure: As an Amazon Associate, I earn from qualifying purchases.